You go through your feed, and every other picture is unreal. The lights of a city that never existed, faces of people that do not exist, scenes that seem to be the screenshots of a film that no one was able to create. In the majority of cases, they are initiated by one brief query in an AI device.
Among these tools that people continue to name is Midjourney. Designers rely on it to be able to draw ideas more quickly. It is also used by marketers when the budget is constrained. Users who are using it as a hobby would simply want to witness their haphazard ideas become images.
You may doubt the worth of Midjourney of your time and money in the year 2025, when various AI image generators are available.
This Midjourney review provides an overview of what Midjourney is, how to use it using easy language, what it costs, when it works, when it doesn’t, and when a different tool can better serve you.
What Midjourney Actually Is?
Midjourney is an artificial learning generation. You simply type what you want to appear, and it returns pictures that correspond to what you type. It operates both on the web and within Discord, the chat application.
In the background of the product, a small independent research lab is also present. The team is concerned with constructing models that are pleasing to the human eye. That is why images created by Midjourney are often discussed by people as more artistic or cinematic compared to other tools.
From a user’s point of view, you can think of Midjourney as three things in one:
- An AI image and video engine that turns text and images into new images and short clips.
- Web app where you can create, edit, organize, and download your work.
- Discord community where you share prompts, get help, and watch how other users build images.
The current free plan does not exist. In order to create images, a paid subscription will be required.
First Steps: Getting Started With Midjourney
Getting into Midjourney looks a bit different from a normal app, because Discord is part of the experience. In 2025, there will also be a full web interface, so you can use whichever feels easier.
A simple starting path looks like this:
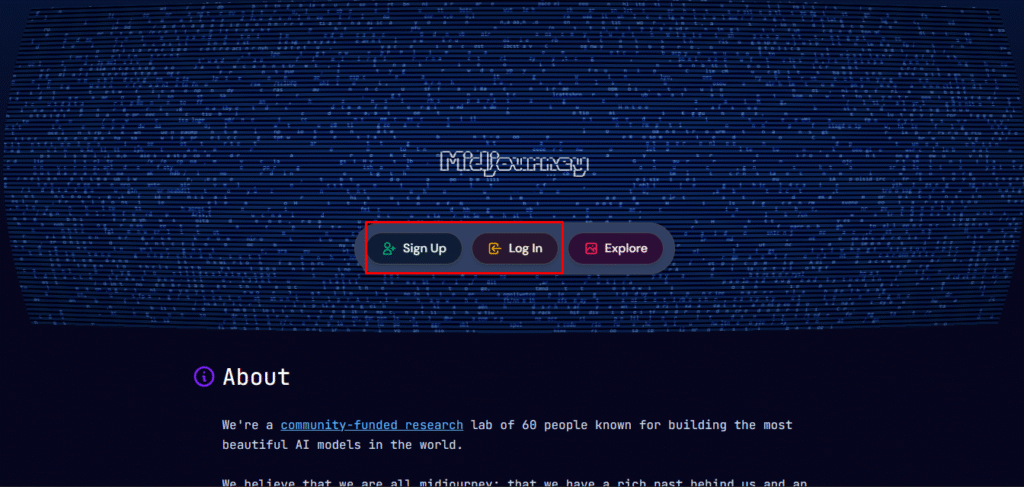
- Create an account on midjourney.com
Sign up with your email, then choose a subscription plan.
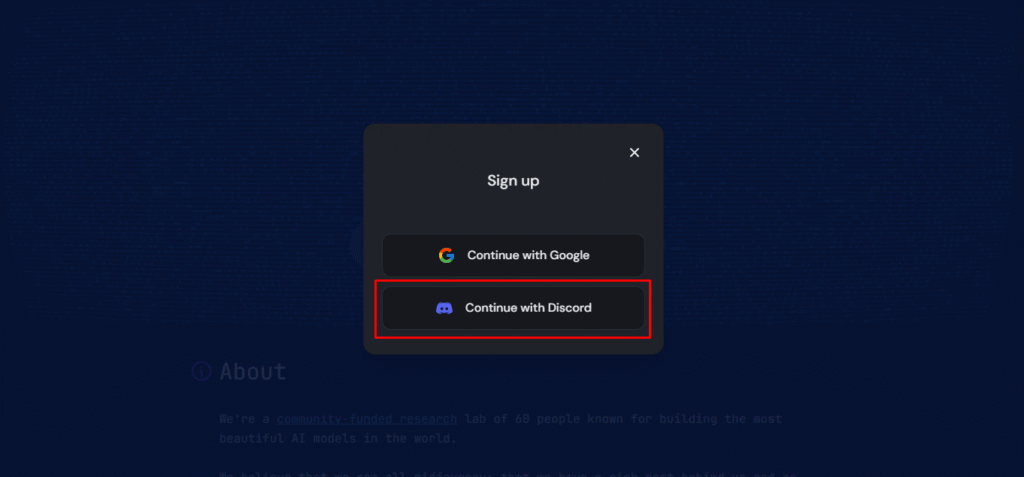
- Connect Discord
If you use Discord, join the official Midjourney server. You can also invite the Midjourney bot to your own server later. If you do not like Discord much, you can stay on the web interface only.
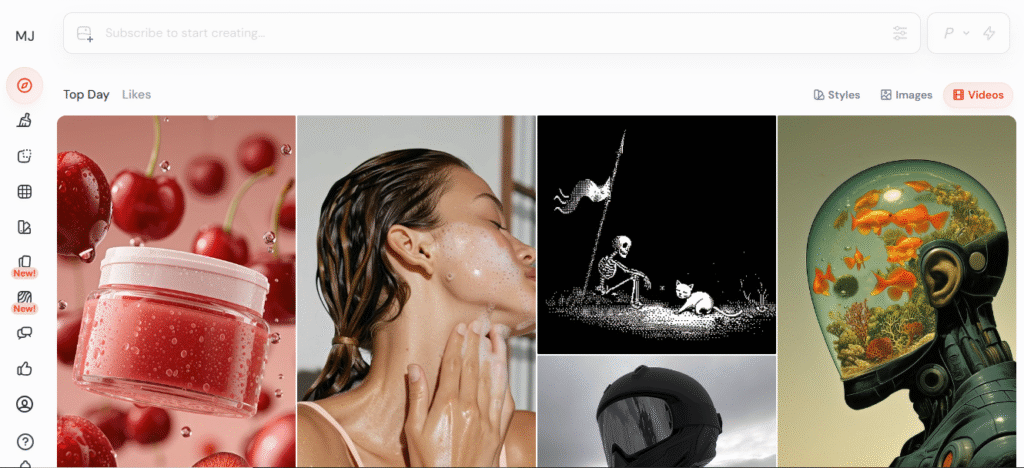
- Go to the Create page on the web
On the website, there is a Create page with a simple prompt bar at the top. This is where you type what you want to see and watch a live feed of your generation. - Write your first prompt
Start with something clear and visual. For example:
sunrise over a quiet lake, light fog, soft pastel colors, ultra detailed
Press enter. In a short time, Midjourney gives you a grid of four images. - Pick and refine
Under that grid, you see buttons to select one image, create more variations, zoom out, pan, or open the image in your gallery. Click the one you like and keep refining it. - Save your work
Open the final image at full size and download it. On the website, you can also put it into folders and moodboards for later use.
On Discord, the flow is very similar. You go into a newbie or general channel, type the /imagine command, write your prompt, accept the terms of service, then wait for the grid to appear and refine it.
Once you know this basic flow, you already understand most of what you do daily in Midjourney.
Standout Features That Shape the Final Image
You can get decent results with simple prompts. To create consistently strong images, it helps to know which features control the look of your final output.
Here are the main ones, in practical terms.
1. Prompt controls and settings
In the web interface, you can adjust settings that change how images look. You do not have to use all of them on day one.
A few important ones:
- Aspect ratio. Controls the shape of your image, like square, vertical, or wide.
- Version and mode. You can pick the main model version and use modes like Raw or more stylized output.
- Stylize and Weird. These sliders tell Midjourney how creative or experimental it should be.
- Variety. Controls how different your four grid images are from each other.
You can set these once in the settings panel, so every new job uses your defaults.
2. Image-based prompts and references
Midjourney is not limited to text.
You can also feed it images to guide the result:
- Use an image prompt to influence composition, colors, or subject.
- Use a style reference to borrow the mood and look of an existing image.
- Use character or object references to keep the same person or object across many images.
This is useful for branding, comics, storyboards, or product campaigns where you need a repeating face, mascot, or layout.
3. Editing tools
After you select an image, more tools open up:
- Vary (strong or subtle) to create four new options that stay close to your chosen image.
- Zoom out to extend the canvas and reveal more surroundings.
- Pan in four directions to expand the scene while keeping your main subject.
- Light editing to fix small issues without starting from zero.
These tools let you treat Midjourney more like a creative studio than a one-click generator.
4. Video from images
Midjourney can now animate images into short video clips. From a single image, you press an animate option, pick how much movement you want, and add a short text hint for motion.
You get a five-second clip at first, and you can extend it a few times to make a longer animation. It is still simple compared to full video editors, but for social posts, teaser clips, or moving moodboards, it is already useful.
5. Stealth and privacy options
By default, your generations are public inside the Midjourney ecosystem. Other users can see them in explore feeds. Certain higher-tier plans unlock a Stealth option that keeps your images and videos private.
If you work with early-stage products, unannounced IP, or client-sensitive ideas, this setting can matter a lot.
How To Create Stunning Images With Midjourney (Practical Playbook)
The real difference between average and great Midjourney results usually comes down to how you describe your idea and how you iterate.
Use this simple playbook as you work.
Step 1: Start with a clear subject
Avoid prompts that are pure feelings. “Beautiful dream” is too vague. The model will guess what you want.
Pick a simple subject instead:
- a person
- an object
- a place
- a scene
Then build around it.
Example baseline:
a street food stall at night in Tokyo
Step 2: Add style and atmosphere
Once you have the subject, add words that describe:
- lighting
- color mood
- era or setting
- camera angle
- medium
Example:
a street food stall at night in Tokyo, neon reflections on wet pavement, cinematic lighting, 35mm photo, slight film grain
You can save your favorite style phrases and reuse them in many prompts.
Step 3: Choose the right aspect ratio
Match the ratio to where you plan to use the image.
- Square for profile pictures or grid posts.
- Vertical for stories, Reels, and Pinterest.
- Wide for banners, website hero sections, and YouTube thumbnails.
If you are not sure, start square, then create new versions in other ratios once you like the base composition.
Step 4: Generate, then zoom and pan
Run the prompt and pick the best image from the grid.
Use zoom out to reveal more environment. Use the pan to stretch the scene left or right. This often gives more natural framing and space for text later in your design process.
Step 5: Iterate in small moves
Instead of rewriting the whole prompt each time, change one or two details:
- Adjust the lighting from warm to cold
- change time of day
- shift color palette
- make the camera closer or wider
This keeps a consistent style while you search for the perfect version.
Step 6: Build a personal style library
Use the organizing tools to put your best images into folders by project or mood.
Note down which prompts, reference images, and settings produced those results. Over time, you end up with your own prompt recipes that match your brand or artistic taste.
Pros & Cons
| Pros | Cons |
| Produces highly artistic, cinematic images with strong style control (Stylize, Weird, modes). | No free plan – you must pay for a subscription to generate images/videos. |
| Polished web app plus Discord bot; no installs or complex setup needed. | Weaker at accurately text inside images (posters, labels, UI) compared to some rivals. |
| Powerful iteration tools: variations, zoom out, pan, light edits, and image/style/character references. | Less technical control than open-source tools like Stable Diffusion; no self-hosting. |
| Relax mode lets heavy users generate a large volume of images, good value at higher tiers. | Public by default; true Stealth/private generations only on higher-priced plans. |
| Can turn still images into short video clips, useful for social posts and teasers. | It may be poor value if you only need a few images occasionally. |
| Strong community on Discord for prompts, feedback, and inspiration. | Legal and brand-safety questions remain around copyright and training data; it needs careful use for major commercial work. |
Pricing and Plans: What You Actually Pay
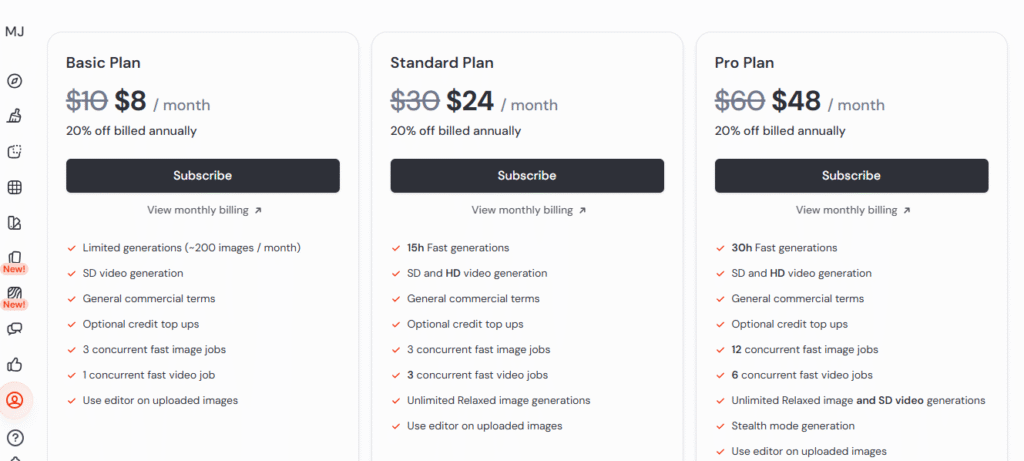
Midjourney has four paid tiers.
1. Basic plan: 10 dollars per month.
2. Standard plan: 30 dollars per month.
3. Pro plan: 60 dollars per month.
4. Mega plan: 120 per month.
Midjourney vs Other AI Image Generators
You probably also hear about DALL-E, Stable Diffusion, and similar tools. Here is how Midjourney compares in practice.
- Midjourney is best for polished, dramatic visuals with minimal setup.
- DALL-E 3 is better for precise prompts and clean text in images.
- Stable Diffusion is for technical users who want maximum control and can handle setup.
| Tool | Best For | Strengths | Weaknesses |
| Midjourney | Mood, style, artistic impact | Dramatic visuals, polished experience | Weaker text accuracy, less technical control |
| DALL-E 3 | Precise, literal images, good text | Follows prompts closely, strong text rendering | Less stylized, image volume can cost more |
| Stable Diff. | Technical, custom pipelines, self-host | Deep control, open source, scalable | Complex setup, more tweaking needed |
FAQs
1. Is Midjourney free to use?
No. At the moment, Midjourney does not offer a permanent free plan. You need a paid subscription before you can generate new images or videos.
2. Can I use Midjourney images for commercial projects?
Most paid plans include broad commercial usage rights, with extra rules if your company makes more than a set revenue each year. Always read the latest terms of service and pick a plan that matches your business size.
3. How many images can I create per month?
There is no single fixed number. Each plan gives you a set amount of Fast GPU hours, which you can think of as a pool of quick jobs, plus Relax mode, where you can generate more slowly. The more Fast hours your plan has, the quicker images you can create.
4. Do I need Discord to use Midjourney?
Discord was the original way to use Midjourney, and it still works very well. In 2025, you can also use a full web interface without spending much time inside Discord. Many people use both.
5. Is Midjourney safe for brands to use?
Many brands already use AI images, but there are still debates around copyright, data, and training sources. If you work with a brand, avoid recreating famous characters or logos, respect artists rights, and have a lawyer review any major campaign that relies heavily on AI-generated visuals.
Final Verdict: Is Midjourney Worth It in 2025
Midjourney remains a top AI image tool in 2025 for creators focused on style and visual quality. It offers stunning images, strong style control, and good value for regular users. While weak with text and deep integrations, its Standard and Pro plans suit most artists and storytellers perfectly.